Professional Secrets For A DIY Rodent Exclusion – Part 1
Searching for professional secrets to perform a DIY rodent exclusion? These pro-tips from Perimeter Wildlife can help you get on your way to a rodent free home.

If you are a DIYer, you sometimes want to handle projects on your own. How can you go about performing a rodent exclusion on your own without any experience in doing so?
Luckily Perimeter Wildlife Control’s professional tips can help you to get a more solid result. Read on and in our newest multi-article series you can find out what are some of the best practices used by professionals all over the world to perform a DIY rodent exclusion.
Rodent Inspection – Inside
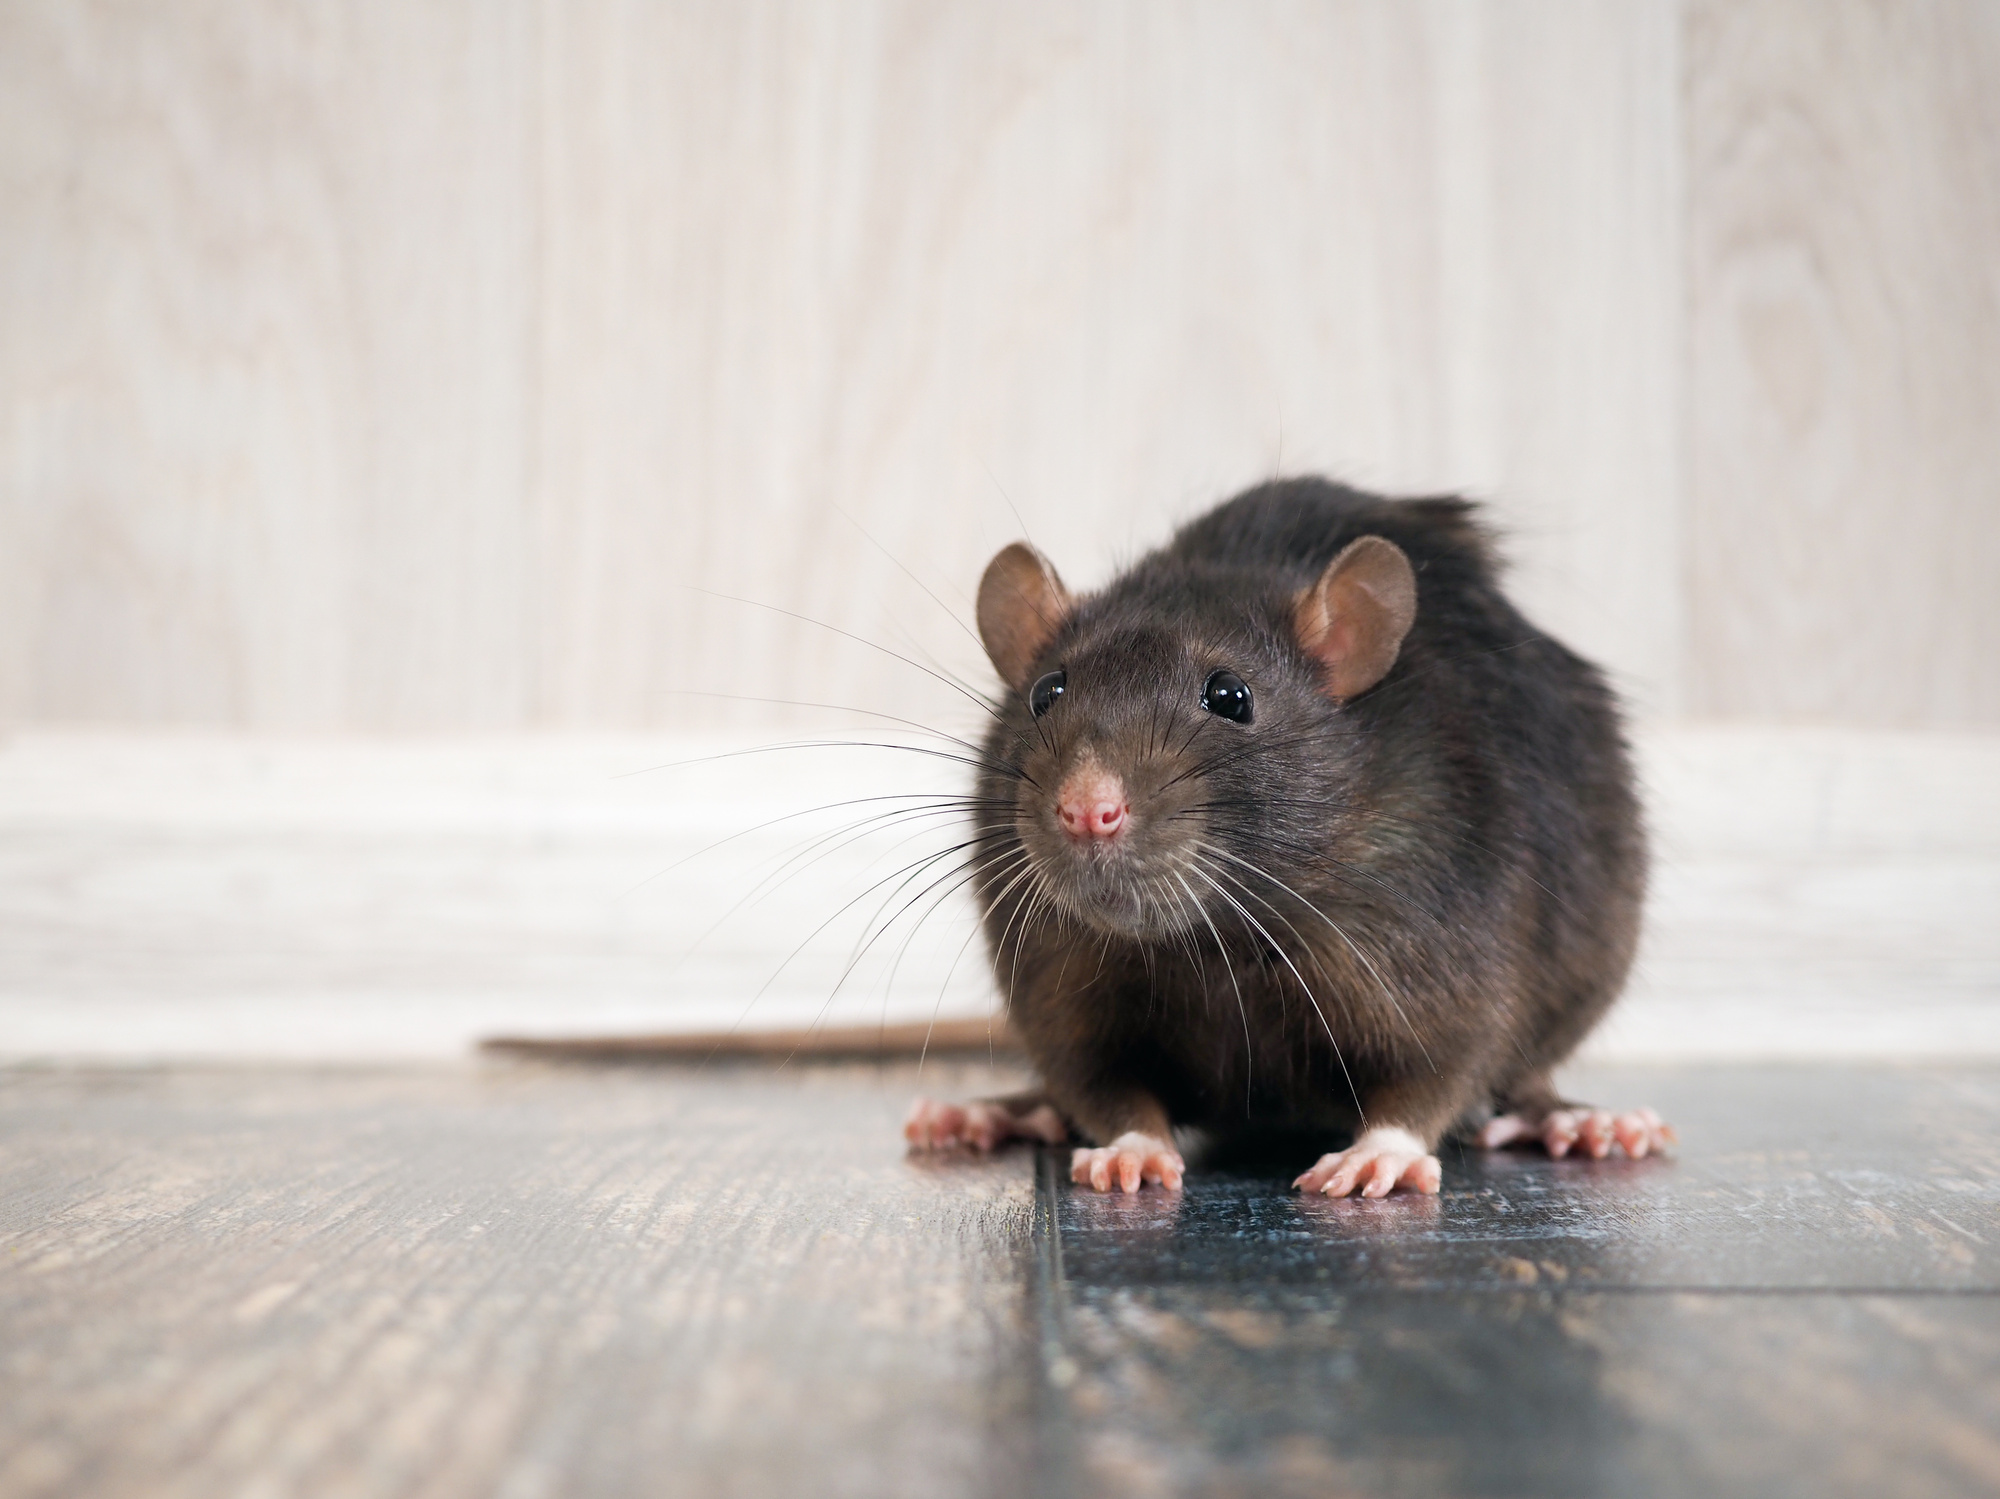
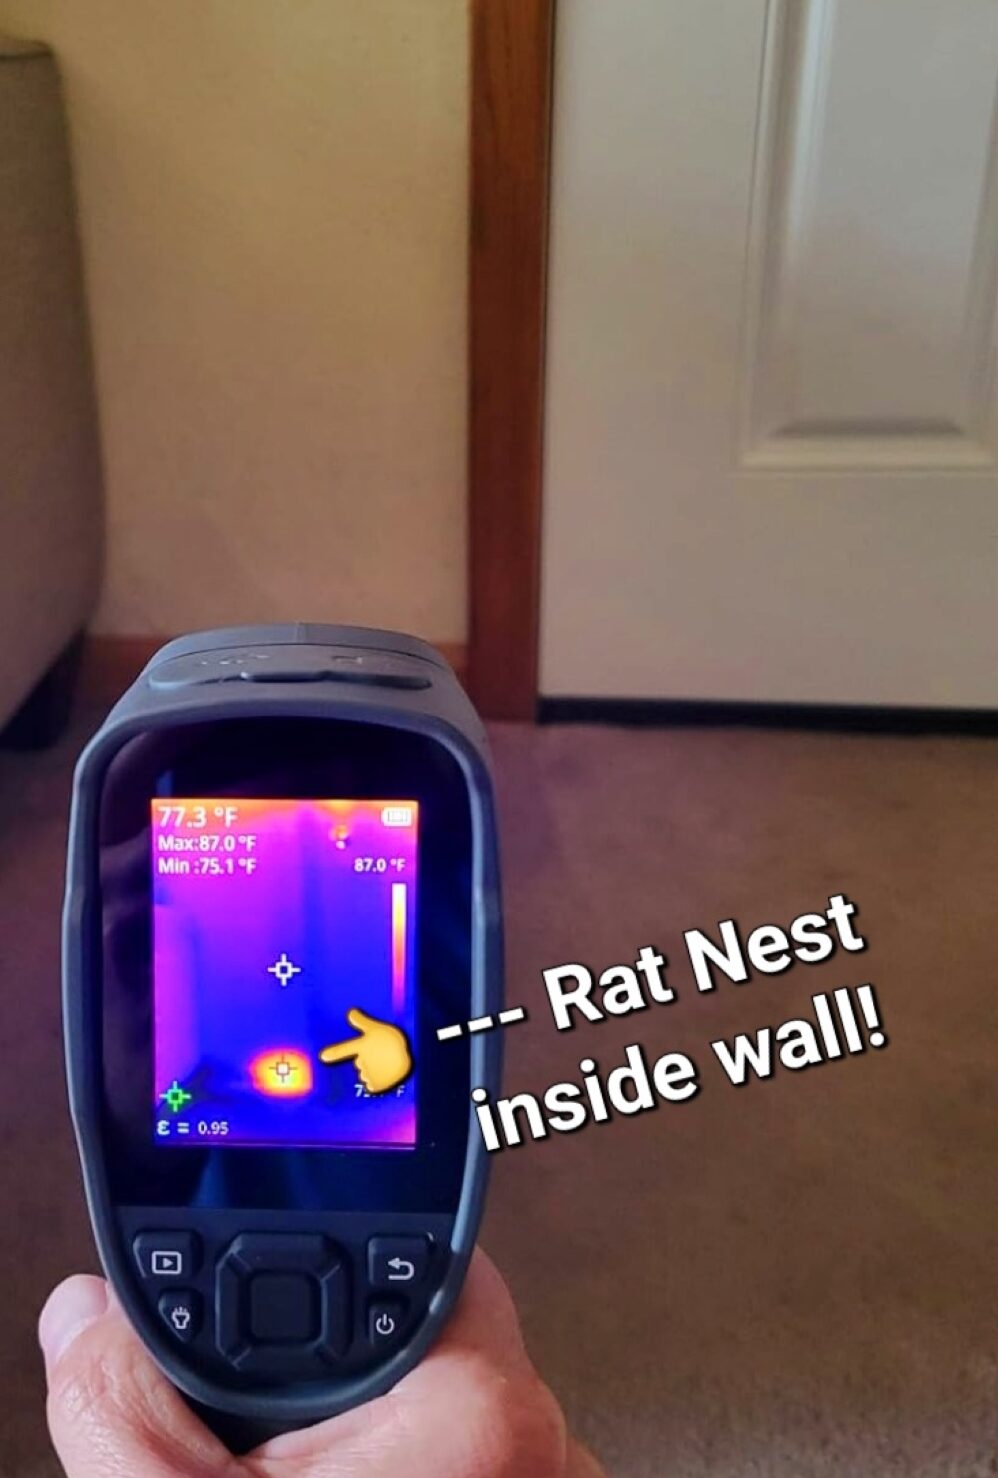
The most important key to a ANY proper rodent exclusion is a good inspection. Rodent inspections should be very thorough and done inside as well as outside the structure.
A thorough inspection of the inside of the structure should be conducted by checking all possible areas of where rodents can be active. Inside the structure these areas include attics, basements, crawlspaces, drop ceilings, laundry rooms, and any other unfinished areas that humans do not frequent.
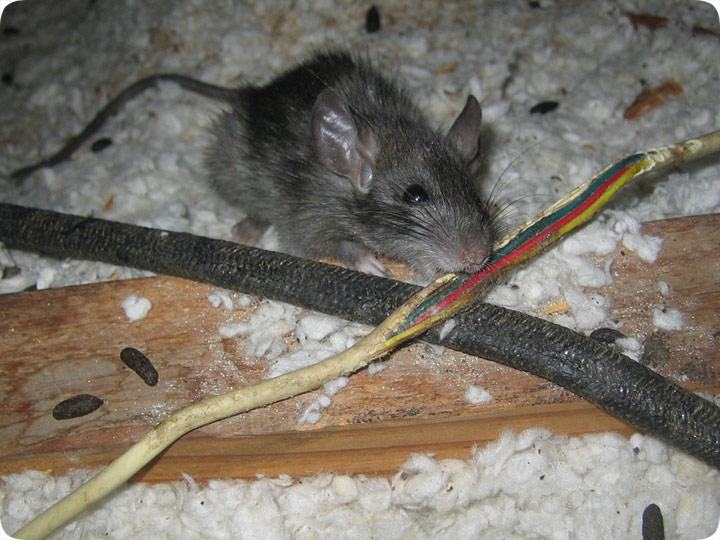
During the inside inspection you should be looking for signs of rodent activity. These signs include rodent droppings, chewing or gnawing, damaged insulation, or even stains of the oils and dirt of the rodent’s bodies as they squeeze through areas. Once you have identified the active areas inside it is time to move on to the outside inspection.

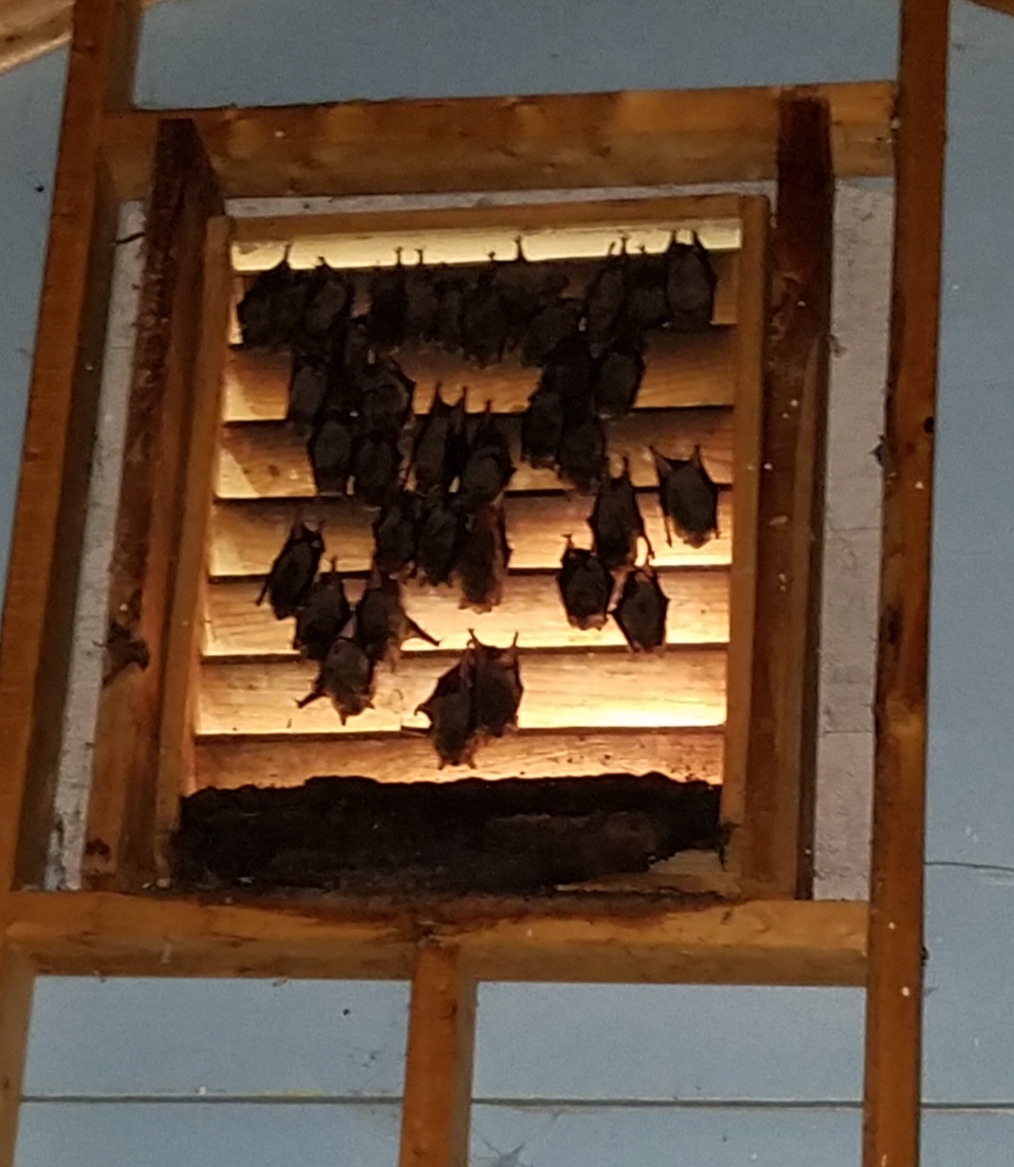
Rodent droppings on a furnace located inside an attic. Notice the wiring has also been chewed on.
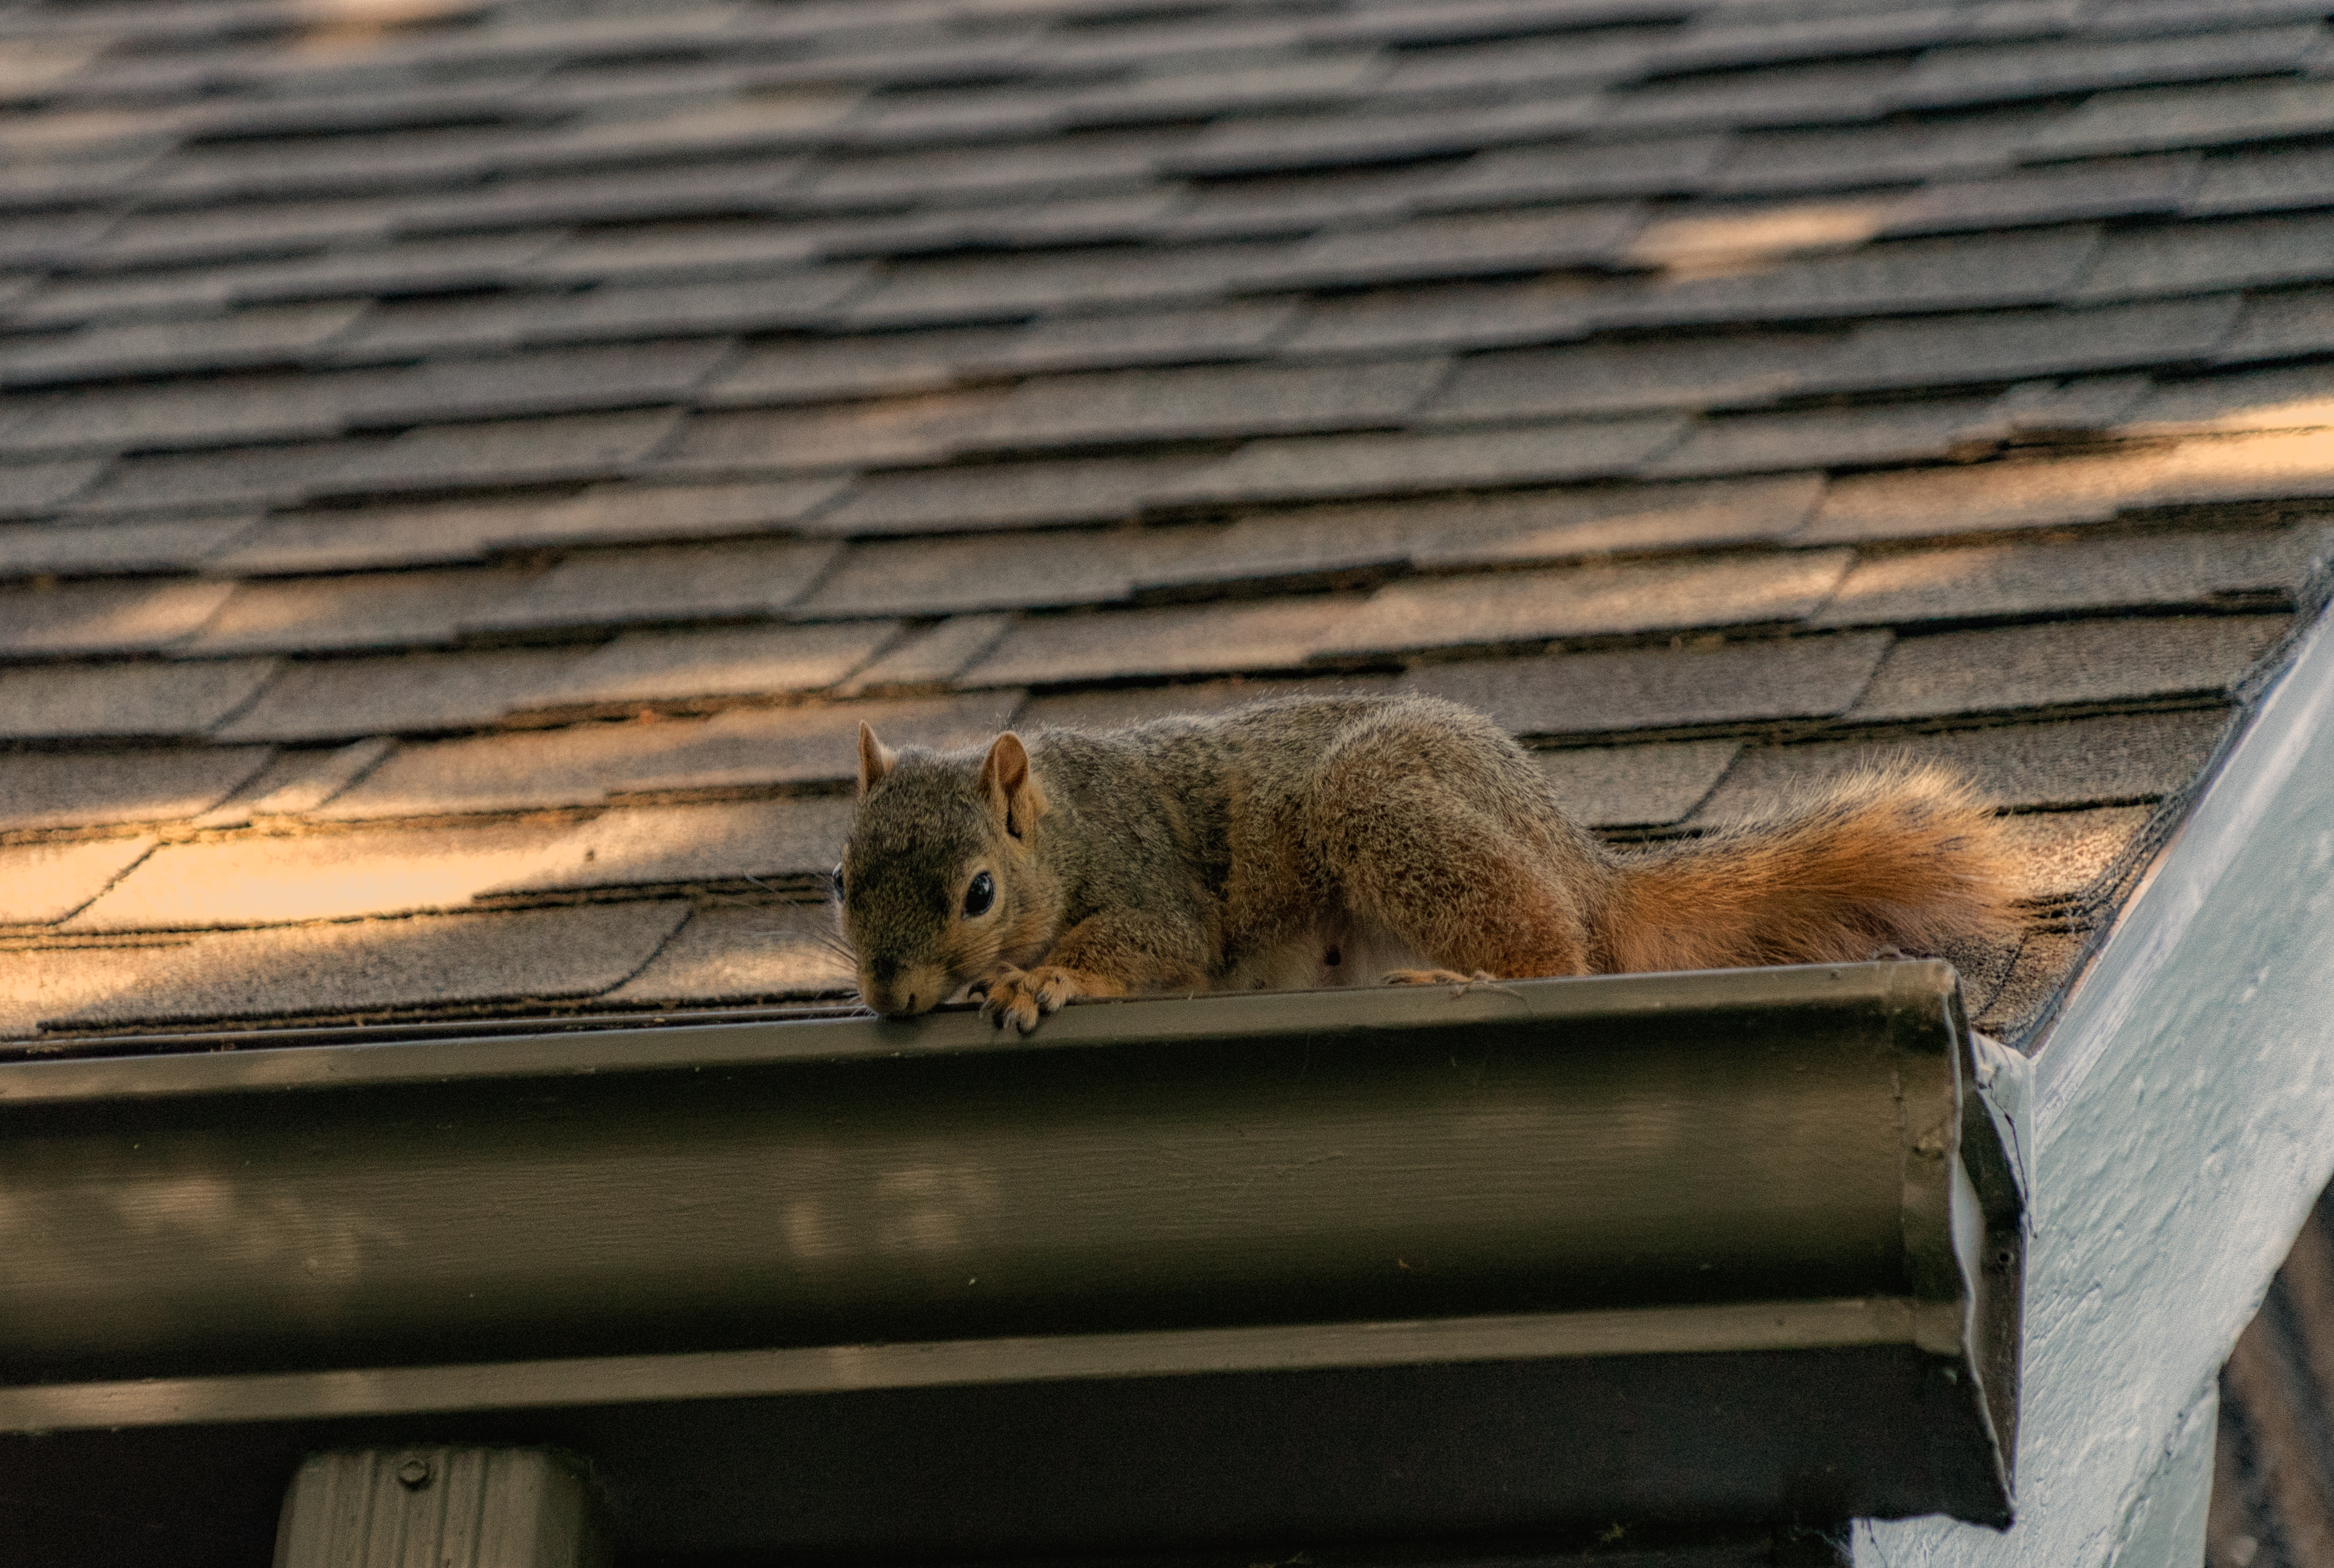
Rodent Inspection – Outside
During the outside portion of your rodent exclusion inspection you should be looking for any cracks or gaps along foundations or siding. Additionally, construction gaps or “builder’s gaps” along rooflines, gutters, or eaves should also be inspected for possible entry points.
Any vents including but not limited to gable vents, exhaust vents, ridge vents, and crawlspace vents should also be checked. Some of these vents may be screened by manufacturers but are likely not screened to be “rodent proof”.
Other areas to note during your outside rodent inspection include rotted wood or trim, gaps or voids caused by utilities or other mechanical systems. Areas where different building materials come together is also a very common area for rodents to make entry into your home. For example the area where brick or stone work meets with siding or stucco.
Any gaps larger than 1/4 of an inch can be a potential area for rodent entry into your home & should be sealed. If you are in doubt of any specific area being an entry point go ahead and plan on sealing it. When dealing with rodents, it is better to be safe than sorry.

Professional Rodent Inspection and Rodent Exclusion
Here at Perimeter Wildlife Control we specialize in the complete removal of rodents from beginning to end. Perimeter Wildlife is “Atlanta’s 24/7 Wildlife Service!!” we offer 24 hour emergency rodent removal services and other critter control services. Call us 24/7 at 770-369-7713 or contact us here!!
If you enjoyed our post, be on the look out for Part 2 of our DIY Rodent Exclusion series.