Searching for How You Can Perform a Bat Exclusion In 6 Easy Steps!?
Attempting to perform a bat exclusion without the proper knowledge, can be intimidating for most homeowners. Let’s face it, Bats are scary! 49 States in the US have documented cases of bats with rabies. This in conjunction with the diseases caused by bat guano & you could potentially have a hazardous situation on your hands. Here are 6 easy steps to perform a successful bat exclusion.
STEP 1: Research & Inspect for signs of Bats
& Wildlife activity…
Do your research, because bats are protected in the majority of the United States, a little research on your part may be necessary for you to perform a bat exclusion in 6 easy steps. CHECK YOUR LOCAL LAWS, FINES CAN BE UP TO $25,000!! For example in Georgia, a bat exclusion CANNOT be performed during the time frame of May 1st – August 15th. Most bats are protected because they are the only flying mammal, this in conjunction with the fact that bats also reproduce once per year & additionally produce only 1 young per year, is the main reason for this May through August time period. Inspecting your bat problem is very important for you to know how to address the situation. Keep in mind when inspecting you want to ask yourself some questions, while inspecting inside your attic ask yourself… What are bat’s roosting signs? Where are the bats located? Can you see the bat colony? How many bats are within the colony? Is there large accumulations of guano in your attic? While inspecting outside you can ask yourself numerous questions as well, Where is the roosting site from outside? Can you access the bat colony from outside? Are there other areas the bats may migrate to so they reenter the structure? The more details you note during your inspection, the better chances you have of performing a successful bat exclusion in 6 easy steps.
Step 2: Seal Every Potential Entry Point, EXCEPT, Where the Bats Are Entering the Roosting Area….
Sealing potential bat entry points to perform a bat exclusion is relatively very simple in comparison to sealing entry points for rodents or other critters. Bats do not gnaw or scratch their way into entry points, instead they use natural gaps or voids to simply squeeze in & “hang” out. Bats can squeeze into areas 1/2″ or larger depending on their size. Numerous wildlife exclusion materials can be used to seal bat entry points including expandable foam, silicone, hard-wire mesh, metal flashing, or a combination there of. NOTE* That during Step 2, making sure to NOT seal the active entry area(s), is the key to successfully conduct your full bat exclusion in 6 steps.

Gable Vent screened to prevent animal access into attic space.
Step 3: Install an Escape Device or Check Valve Over the Bat Colony’s Roost Entry…
Install a Bat Check Valve or escape device over the entry point to the bat colony’s roosting area. There is no set way to make a bat exclusion device, it just depends on where the entry point is located. You can use a plastic contractor bag & duct tape, tarp & stapler, mesh screening shaped like a tapered funnel, or you can purchase different type of “universal” or bolt -on devices (also called bat cones, bat funnels, etc). The idea is to install it over the entry point & funnel them to exit away & about 2 feet below from the area where they entered the structure, the bats geo-location will guide them back to the area where they exited. Not realizing they can simply climb back up & into the check valve, they will relocate after several attempts of not being able to re-enter the structure. Think of your escape device as a way for the bats to exit & not be able to return. Keep in mind when installing your bat check valve, that you will usually be extremely close to the colony, use extreme caution when installing your bat escape valve, especially if working on a ladder, scaffolding etc.; also note that any other areas near the roost should be sealed before excluding. Once you’ve installed your bat escape device, sit back relax & watch your bat colony exclude itself, as the bats leave the roost around sundown for the evening. You are now half way to performing a full bat exclusion in 6 steps.
Step 4: Wait 3-5 days for the bats to exclude themselves…
Now you wait, patience is key to conducting your bat exclusion like a professional! Waiting to remove the check valve for 3-5 days after the installation, even though your bat colony may have exited the 1st night is a good idea for multiple reasons. First it insures that the bats were not able to gain re-entry into your escape valve for multiple days, indicating that the device functioned as planned / designed. It also allows for the occasional bat that may have gotten lost inside the escape device or been left behind the 1st night to exit the valve. Towards the end of the 3-5 day waiting period, re-inspection of the attic is recommended, if the bats are returning, your check valve is not doing its job. Readjust the device & confirm there are no other entry points for the bats to gain access. Wait 3-5 days again…
Step 5: Remove Your Bat Check Valve & Seal Bat Roost Entry Point…
After your waiting period is complete & you have visually confirmed the bats exited the structure, remove your check valve & seal the entry area after confirming the bats are no longer inside your attic. Before sealing the entry point, if there is any guano accumulation present, you will want to clean up or sweep the guano out of the area prior to sealing the bat entry point (see Step 6). When cleaning up dropping outside, it helps to wet the droppings so they do not break up into small particulates than can be breathed in.

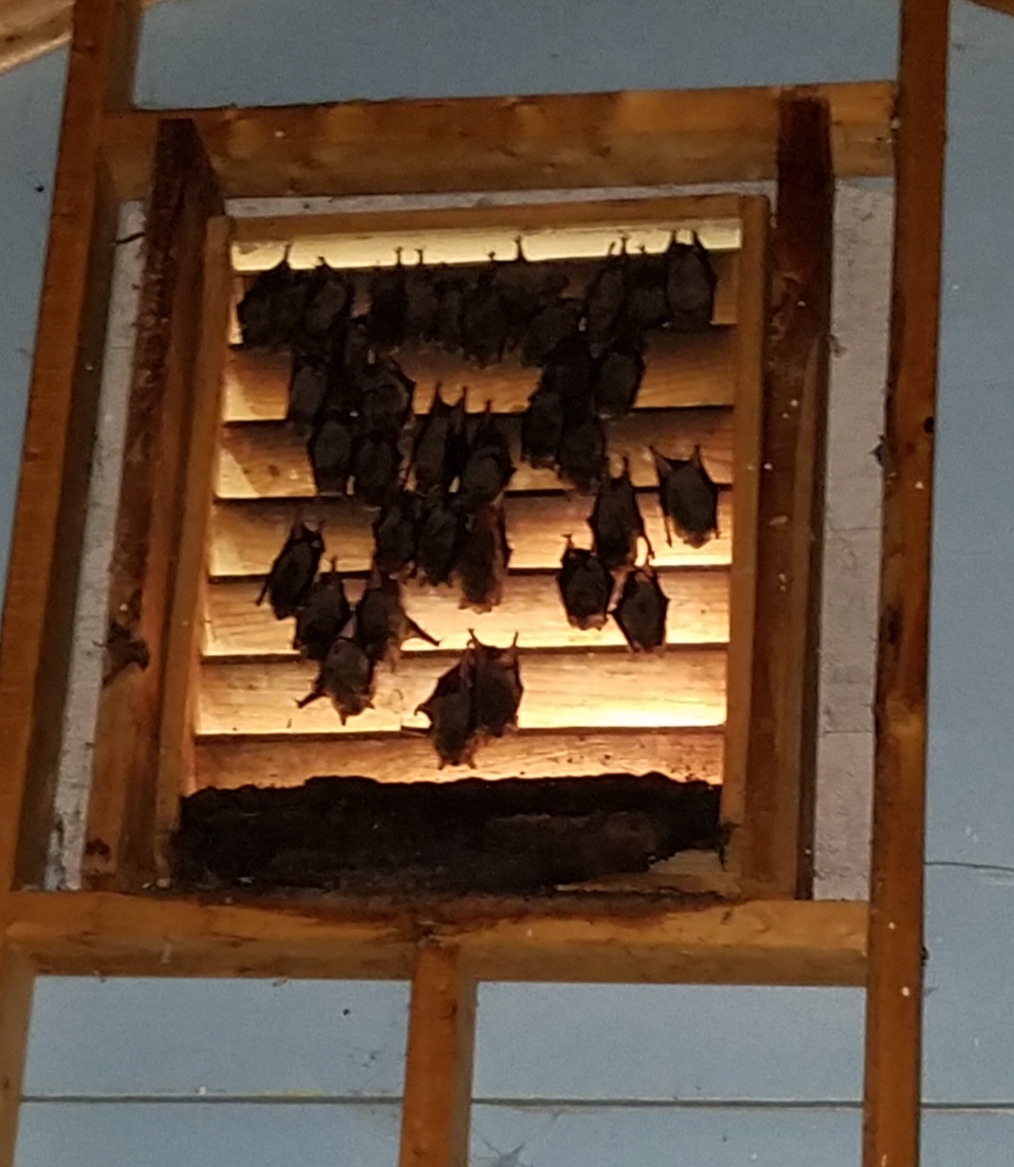
Bat guano accumulation underneath a gable vent, inside an attic.
Step 6: Clean up all bat guano & decontaminate bat roosting areas…
Once the bat colony in your home has been excluded, it is time for this final & essential step: Clean-up & Decontamination! Buy a wet/dry utility vacuum, & plan on throwing it out,(**Pro-Tip**) you do not want to keep that around to use at home or even try to clean it out! You will also need a cartridge style respirator with cartridges labeled to protect you from “Organic Materials”, gloves, goggles, & a protective coverall suit, if desired. Clean-up all bat guano & the surrounding areas of insulation. Once completed cleaning up all soiled areas, add insulation if required & sanitize the affected areas with your household disinfectant of choice. Simply spraying it & letting it soak in would be sufficient, although power sanitizing with an industrial fogger is how the professionals perform the process.
Congratulations!! You’ve just performed your first bat exclusion & decontamination in 6 easy steps like a professional wildlife control technician. These steps to perform a bat exclusion are the very same steps taken by Perimeter Wildlife Control’s certified technicians to rid your home bats. Perimeter Wildlife performs emergency wildlife removal services all across the Metro Atlanta area, as well as the surrounding areas. Call us 24/7 to schedule an appointment at 770-369-7713!!

“Atlanta’s 24/7 Wildlife Service!!”
Disclosure: This article is for informative purposes only, & is by no means a replacement for having a trained wildlife professional evaluate your specific situation. Perimeter Wildlife Control, LLC. assumes neither liability nor responsibility for damage, injury, contracting rabies, or other disease, etc. due to poor practices, or the attempt of using this blog post as a complete step by step guide, in lieu of hiring a wildlife control professional.